Installing Snow Chains on SMA Jeeps
This page is an aid to help you install the chains on the SMA vehicles. If you are an observer, it is unlikely that you will ever need to do this, but if you are caught at the summit, this page is here to help. Hopefully you have taken Les' training course and this will just be a refresher.There is no reason for the observers to be at the summit under these sorts of bad conditions and they should evacuate the summit before the need to use chains arises.
Important Points:
- If you are going down the mountain, place the chains on the FRONT tires. If you are going up the mountain (a less likely scenario for observers) put the chains on the REAR tires. In heavy snow conditions, you will need to use chains on all 4 wheels. An extra set is available in the summit hangar.
- NEVER exceed 25 mph. The chains will cause EXTREME damage to the vehicle and possibly the brake lines.
- After applying the chains, stop and retighten them after a couple of hundred feet or so. You will not be able to install them tight enough on the first try.
- Installation of chains or cables on vehicles other than this Jeep is a very similar process.
- NEVER attempt to reach the summit in bad conditions without precise orders from the scheduler. Loosing a night of observations is not worth risking your life.
Click on any picture to enlarge it and enter "slideshow" mode.
The Tools:
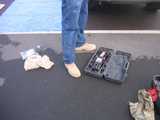
Jack, Chains (in cloth bag), Pliers, and Chain Tightener (in plastic bag). 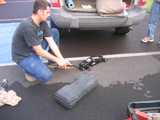
Remove the jack from the case and use the handle to turn the square nut to the right to put it into 'lift' mode.
The Jack:
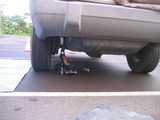
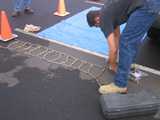
Make sure you are on a hard flat surface (the jack will sink into soft dirt under the weight of a vehicle). Ensure the vehicle is in park and the hand brake is applied. Position the jack under the rear axle. Close up follows... 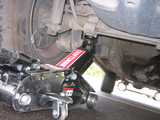
There is a solid pad on which to position the jack. You will only need to lift it a couple of centimeters to slide the chain under the tires.
Chain Inspection:
Lay the chains out and inspect them for separated links. The links can be reattached if they have come unhooked in the bag. 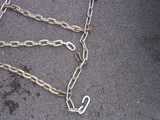
This chain had a link unhooked. It can be reconnected by sliding the hook link over the narrow part in the oval shaped link. 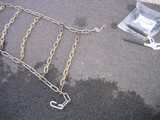
The loop at the bottom of the picture is just a basic hook connection. It will be the one you put on the inside of the tire. The more complicated connector at the top is the one you will use to make most of the tension, so it needs to be placed on the outer part of the tire where it is easily accesible.
Chain Placement (using jacked car; see below if terrain prohibits using jack):
Hold the chains as shown with the more complicated connector at the bottom. Then drape the chain over the tire. This will ensure the correct connectors are in the correct positions. 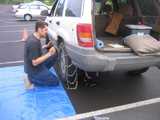
With the chains draped over the tire, you are now ready to connect the inner loop.
Chain Connection:
Reach around and connect the inner hook connector first. Depending on the temperature, you may be able to connect to the longest loop, or more likely you will be able to connect the hook to the second or third loop from the end. 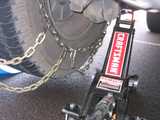
In this picture Les was able to connect it to the 3rd loop (see the two loops hanging? These need to be secured with a bungy cord to an adjacent part of the chain so they do not fly around while driving). 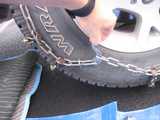
Now come back around to the outside and connect the outer connector as tight as possible as shown. Pull back the hook and slide the loop down over it (see next picture). 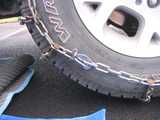
This picture shows the outer hook fastened correctly in place.
Chain Tensioners:
Use the rubber band to apply additional tension to the chains. 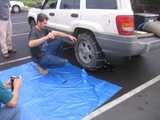
Stretch the rubber band and connect the metal loops to the chains. 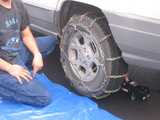
Repeat until you have connected 4 or 5 of the loops from the rubber band to the chains. If you can only get 4 connected, remove the fifth metal loop and put it back in the box.
Finished! Lower Jeep:
Now remove the jack handle and use it to turn the square bolt to the left to lower the vehicle. It is now important that you drive around a bit on the chains. They will get loose. After a few hundred feet, retighten the chains as necessary.
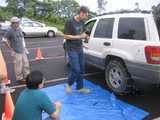
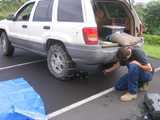
ALTERNATE Chain Placement (without Jack):

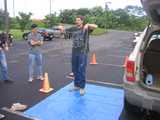
If you do not have a level or solid ground on which to jack the vehicle up, you can lay the chains out as shown and drive onto them. 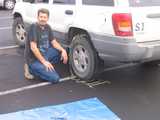
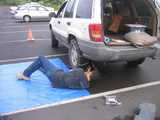
Once you have driven onto the chains, pull the longer side up and over the tire as shown. 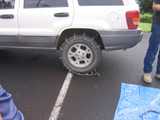
By parking at one end of the chain instead of the middle, you can use the weight of the chain to help you get the correct tension while you connect them. 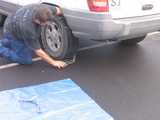
Start by connecting the inner loop first. 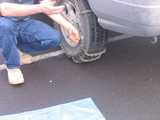
Once the inner loop is connected, you can then connect the outer hook as shown.